Tuesday, October 30, 2012

How to Edit and Turn in Your Action Pictures

     Turn in 24 picture Action Contact Sheet
 
·      Start Editing Your Ten Best Action Pictures
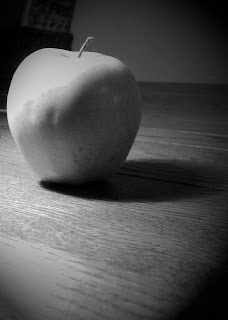
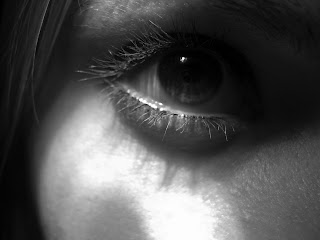
Make sure you have 1 grayscale, one one-item kept in color, and two mild selective focus picture
·      Do Not Add Text (yet)
·      Create a Folder with your ten best Action Pictures as JPEGS
·      Name the folder with your name and the name of the sport
·      Drop the folder into the Vidstore Server>Public>Yearbook Action Photos
  1. Go
  2. Connect to server
  3. Vidstore.shorelineschools.org        
  4. Name: scvideo
  5. Password: Outback23
  6. SCvideo classes
  7. Public Folder
  8. Yearbook Action Photos

·      Add Text to Pictures
·      Use student names and teams when describing action
·      Turn in Action Photos adjusted to Staff Server as a Contact Sheet
·      Turn in Best Action Picture without text
 

Thursday, October 25, 2012

Action Photo Practice

Action Photo Practice

Today you will shoot and turn in a full contact sheet of action pictures. 
You should have 10-12 SUCCESSFUL panning style pictures using shutter speeds of around 1/20-1/60 and then 10-12 pictures of regular fast shutter speeds (usually 1/250-1/2000).
Have your subjects repeat the same action over and over.

How many of you remembered to bring some sporting equipment?

Suggested activities to shoot: someone running across the field, someone doing back handsprings or other gymnastic moves, anyone playing catch with a football or baseball, and hackysack etc. 
 

Crocodile Hunter.
 
Please return to class at 11:35 so you can upload your pictures and turn in the Contact Sheets. 
Your SC Sports pictures are due Tuesday.
We have a quiz Monday.

Monday, October 22, 2012

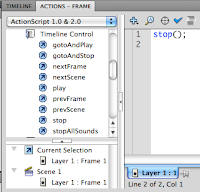
Creating Action Script

To create a STOP action script do the following:
1. Create a STOP layer on your animation timeline.
2. Control click and select actions.
3. Under TIMELINE CONTROL in the upper left hand corner double click STOP.


To create ACTION SCRIPT for your button do the following:
1. Click the frame that your button appears in the timeline.
2. Select directly on your button you have created down in the work area (not on the timeline).
3. Control Click>Actions
4. Under MOVIE CLIP CONTROL select ON and then RELEASE
5. Move the cursor to the second line
6. Under TIMELINE CONTROL select GOTO AND PLAY and then type in the frame where you want the button to transport the gamer player on the timeline.
Note: at the bottom of the Action Script commands your button should be selected under current selection:


Monday, October 15, 2012

Animation: Choose Your Own Adventure Assignment

CHOOSE YOUR OWN ADVENTURE ASSIGNMENT:
For this project you will be creating an adventure of some sorts that pauses periodically and gives the viewer a choice in where the story goes, thus a "choose your own adventure" tale! Your movie must contain:


* Full figures with detailed animation (no stick figures)
*multiple motion and shape tweens
* movie clips
* at least six instances of sound, sound should FILL your animation

* 8 Buttons
* goto and play
* stop
* up, over, down, hit states
At least three places where decisions need to be made


Please answer the questions below using Text Edit and drop the responses into the Staff Server>Mitchell>Classes>Period 1
Use complete sentences.

* Who are the characters? List at least two.
*Where does the story take place?List precise location with details.
* What is the main story from beginning to end? What is the main character trying to do?
* What are the options in the choose your own adventure? What are the outcomes?
* How will your animation be more interesting and better looking than your last project?

Monday, October 08, 2012

Flash Tutorials for Choose Your Own Adventure Assignment

Button:
http://www.youtube.com/watch?v=NLP7A9IYptU

Action Script 2.0
http://www.youtube.com/watch?v=PdvPEaoU7tg&feature=related

Action Script 2.0

http://www.youtube.com/watch?v=Q-QkWaY9y1o&feature=related

Grayscale Adjustments

Grayscale Adjustment Assignment

Please adjust your best 24pictures (out of the 48) pictures using the six methods we discussed in class.
You must adjust four pictures for each adjustment method.

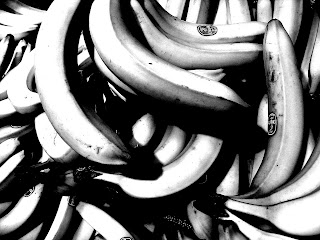
The adjustment methods: Basic Black and White (BBW), Calculations Method (CM), Lightness Channel (LC), Ansel Adams(AA), Duotone (DUO), and Basic Channel Mixer (BCM).

Please save and name each picture with the appropriate adjustment method abbreviation (BBW or CM etc.)


Thursday is your final Shooting Day for this project. You will pick a location where you can focus on MAN MADE shadows. Please bring your own camera.


Tuesday, October 02, 2012

Digital Photo 1: Grayscale: Pattern and Shadow Assignment


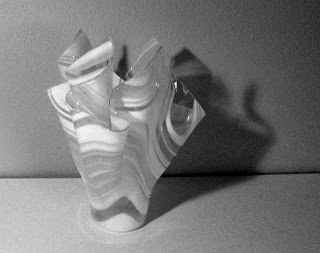
Your assignment over the next two weeks is to shoot 24 pictures involving man-made shadows and 24 other images involving lightness/darkness relationships with a focus on patterns. 48 pictures total.

  • Thursday October 4 is an off-campus shooting day.
  • Your homework over the weekend is to shoot 24 pictures with your own camera. For your weekend assignment you may shoot outside during the day or at night. Or, if you prefer, you may use man made light at any time.
  • Tuesday you will edit pictures in class using the various methods we have discussed in class.


AP Photo: Shapes and Textures etc.

Read and take notes. There will be a note check today.

Shooting vertical or horizontal
http://www.kodak.com/ek/US/en/Home_Main/Tips_Projects_Exchange/Learn/Photo_Tips_Techniques/Advanced_Techniques/Composing.htm

Choosing a main point of interest

http://wwwca.kodak.com/CA/en/consumer/guideToBetterPictures/eStores/index.jhtml?style=&cat=9&subCat=1

Adjusting your angle of view

http://wwwca.kodak.com/CA/en/consumer/guideToBetterPictures/eStores/index.jhtml?style=&cat=9&subCat=2

Placing the subject off-center

http://wwwca.kodak.com/CA/en/consumer/guideToBetterPictures/eStores/index.jhtml?style=&cat=2&subCat=5

Using leading lines

http://asp.photo.free.fr/Composition/photoProgramCompClass41.shtml
Click NEXT for examples.

Avoiding distracting backgrounds 

http://asp.photo.free.fr/Composition/photoProgramCompClass62.shtml
Click NEXT for examples. 

Including foreground objects

http://wwwca.kodak.com/CA/en/consumer/guideToBetterPictures/eStores/index.jhtml?style=&cat=2&subCat=6


Project

After reviewing the rule of thirds and visiting the above assigned Kodak sites, you are to photograph the following Plan Your Photo Composition (36 works):


1. Hands (such as braiding hair, holding something, working on something) (4 works)

2. Feet/Shoes (4 works)
3. Geometric Shadows/Forms (4 works)
4. Organic Forms and/or Texture (4 works)
5. White on white/eggs (4 works)
6. Lines (4 works)
7. Glass/transparency (4 works)
8. The remaining photos are your choice (8 works)

You will most likely shoot 350-400 pictures to get 36 total picture. In general plan on shooting at least 10 shots per turned in picture.

October 4: Read and take notes. Then explore the web looking for examples of each composition and subject listed above. You can take practice pictures as well.
Thursday October 4: Out of class shooting day (you can shoot in the studio if necessary)
Tuesday October 9: Import and Editing
Thursday October11: Out of class shooting ((you can shoot in the studio if necessary)
Friday October 12: Import and editing