Touch-Up Techniques in Photoshop
Clone Stamp, soft edge brush, lighten mode
Lasso clean area, feather, option-apple, drag and drop
Patch tool, select area you want to change, drag to clean area
Blur technique: Gaussian blur, adjust pixels, open history palette, click open, select history brush next to Gaussian blur, select history brush and paint blur onto photo
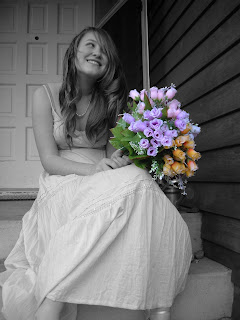
Color hair: change color balance, press x, option-delete, select brush, press d, begin painting
Whitening teeth: select teeth, feather, open hue and saturation, lower saturation on yellow, change back to master and raise lightness, deselect
Remove glair, hot spots, or glow: select clone stamp, darken mode, soft brush, 50% opacity, option click and then paint over “hot” areas
Wednesday, October 31, 2007
Tuesday, October 30, 2007
To Create Your Portrait Slideshow in iPhoto
To create a slideshow:
Drag all of your pictures you adjusted into a new album in iPhoto.
Select the album so it's highlighted in iPhoto.
Click the Add (+) button in the bottom-left corner of the iPhoto window, then click Slideshow in the dialog.
Type a name for your slideshow.
If you want, deselect the “Use selected items in new slideshow” checkbox.
Click Create.
Drag photos into the order you want in the photo browser at the top of the iPhoto viewing area.
After you create a slideshow, you can also add photos to it by dragging them directly from an Event, another album, a CD or DVD, or another location on your hard disk. When you add a photo to a slideshow from another location on your hard disk, iPhoto automatically imports it into your photo library.
You can choose music, specify the display duration for each slide, choose transition effects, display slideshow controls, and set other options
Wednesday, October 24, 2007
Photo Contest
North End Seattle High Schooler’s Photo Contest at
The Haller Lake Community Club
The Haller Lake Arts Council is putting on a High Schooler’s Photo Exhibition, to be hung on Saturday, Nov. 3rd. The show will be up for the Salmon BBQ event the following day. We are inviting the following 6 High Schools to participate: Nathan Hale, Ingraham, Shorecrest, Shorewood, Ballard, and Roosevelt. Awards to be determined.
Submissions: Each student can submit 1 black & white photo. All photos should be should be 8” x 10”. The image size can be smaller, and have a border. Bear in mind, viewers will stand 5 feet away from your image. Photos will be placed in an 11” x 14” clip frame, against a white or black backround. All entries must be submitted by Wed., Oct. 31st. Although the Art Council has no wish to place limitations on your work, we ask that you omit nudity or vulgar language, as the viewing audience will be families with children. Please leave your entry & completed application with your instructor in a large envelope. Nancy Cubbage and Nina Carmichael will pick up all entries from your photography teacher on Oct. 31st.
Students must pick up their work by 5:30 p.m. the day of the Salmon BBQ, Sunday, Nov. 4th. The exhibit will be juried by members of the Haller Lake Arts Council.
The Haller Lake Community Club is located in North Seattle, 3 blocks east of Aurora Ave N. at the corner of N 128th and Densmore Ave N.
12579 Densmore Ave N., Seattle, WA 98133
The application looks like this:
Haller Lake Photo Contest Application Form
Submit this application & one black and white photo entry 8” x 10” size to your photography teacher by Tuesday Oct. 30th. Your image can be smaller and have borders, bear in mind that your work will be viewed at a distance of 5 feet. As this is a family event, no nudity or images of vulgar language will be exhibited.
Name: ___________________________________________________________________
High school you attend: ______________________________________________________
Age: ______ Phone: _________________Email Address: ___________________________
Biographical statement (optional): ______________________________________________________________________________________________________________________________________________________________________________________________________________________________________________________________________________________________________________________________________________________________________________________________________________________________________________________________________________________________________________________________________
Title of photo: _____________________________________________________
Pick up your photo up at 5:30 p.m. after the Salmon BBQ / Arts & Crafts event Sun., Nov. 4th. If you are unable to pick up your work at that time, contact Nancy at nan808@speakeasy.net or at 206-789-6225.
Monday, October 22, 2007
Lighting
Lighting Styles
http://www.fodors.com/focus/focselect.cfm?catid=7
http://ndnd.essortment.com/photographyli_rawq.htm
http://www.fodors.com/focus/focselect.cfm?catid=7
- Creating Killer Headshots: The Cheap Way! - David Griffin
- A quick start guide to the one light setup - David Griffin
- Back Lighting - Studio Lighting Setup - StudioLighting.net
- Paramount (Butterfly) Lighting - Studio Lighting Setup - StudioLighting.net
- Multiple Light Portrait Setup Hints - David E. Price
- Short Lighting - Studio Lighting Setup - StudioLighting.net
- Broad Lighting - Studio Lighting Setup - StudioLighting.net
http://ndnd.essortment.com/photographyli_rawq.htm
Sunday, October 21, 2007
Plan For Class this upcoming week
- Monday: Import portrait homework from the weekend. Create contact sheet in Photoshop and send to Mr. Mitchell for viewing (but not printing).
- Tues/Wed: Students will have the whole period to shoot additional portraits. Students may create a concept for a student in class and shoot indoors with the lights or outdoors using natural lighting. Students may also choose to leave school and shoot another subject of their choice.
- Thursday/Friday: Students will manipulate images. Mr. Mitchell will review images and determine whether or not students need to take more pictures to get the
- ultimate" portrait.
Friday, October 19, 2007
Thursday, October 18, 2007
Portrait Hints
Color enhancement and tone
Lighting: use lighiting for effect
Background and location: make it interesting
Photo Shop Effects
Props
Costumes
Make-Up
Learn something about the photographer
Lighting: use lighiting for effect
Background and location: make it interesting
Photo Shop Effects
Props
Costumes
Make-Up
Learn something about the photographer
Portrait Assignment
1. Find an interesting human subject. The person you choose should WANT to be in the picture and they should be willing to cooperate.
2. Talk to your subject. Use colors or lighting to create a concept for your portrait. Costumes or uniforms work great. Imaginary ideas are OK. Choose an interesting setting based on your concept.
3. Change angles between shots. Shoot at least 24 pictures of the SAME subject.
4. Use props if they will help the audience learn something about the subject.
5. Vary the lighting. Use filters, flashlights, lamps, or multiple lights to enhance your picture.
6. Encourage different emotional looks. Pretend you are Austin Powers taking pictures. Tell your subject they are "groovy".
7. Having your subjects "pose" in action is just fine.
8. Most importantly for this assignment don't forget your compostion rules. Use framing, leading lines, rule of thirds, color contrast etc. to enhance your photo. Fill the frame.
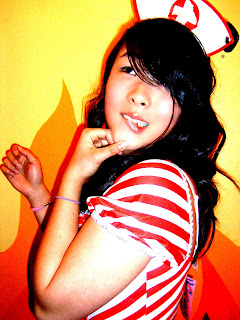


Monday, October 08, 2007
Photomerge Examples


I created the Photomerge of Alki last summer, but the rest are student examples. Where will you shoot your Photomerge?
Please make at least five attempts at your subject. In other words you will have between 15 and 25 pictures by next Tuesday/Wednesday.
Use a tripod if possible. Remember to manual adjust white balance or select something like "cloudy" or "sunny" on your camera.
Be sure to read the hints in the article below.
Final Grayscale Assignment
Adjust your pictures using the five methods we discussed in class.
You will turn in one picture for each adjustment method.
Methods: Lightness Channel, Ansel Adams, Calculations, Duotone, and Gradient Map.
Make sure all pictures are cropped as needed, have a definitive subject, and have an extreme dark and light point. Proper photo composition is essential.
You will turn in one picture for each adjustment method.
Methods: Lightness Channel, Ansel Adams, Calculations, Duotone, and Gradient Map.
Make sure all pictures are cropped as needed, have a definitive subject, and have an extreme dark and light point. Proper photo composition is essential.
- When you are finished create a new Folder titled with your name.
- Drag all five of your pictures into this folder.
- Each picture should use the naming convention and indicate what method you used to adjust it. Make sure that ONE of your pictures has PRINT in the naming convention.
- Drop this folder into the STAFF server under the proper class period.
Thursday, October 04, 2007
Photomerge!!!
http://www.layersmagazine.com/making-perfect-panoramas-with-photomerge.html
Click the link above for help making the perfect Photomerge.
A very important point from the article: "Don 't use any automatic setting on your camera. If the focus, exposure, or white balance is set on auto, the camera will slightly shift the focal point, exposure, and color to reflect what it's pointing at. As you aim the camera from one area to the next, the changing exposure will make the merged images look splotchy. If you're photographing during the day, set the white balance to daylight or cloudy. For more critical color, do a custom white balance of the area you're shooting."
Wednesday, October 03, 2007
Subscribe to:
Posts (Atom)